

Requirement module helps user in specifying the requirements at the start of the project.
Here we will show the various features present under requirements module, in a step-by-step fashion.
You can click on the images below to view them in full size.
- Open QC application and provide the valid user name and password. Select the domain name and the required project name from the drop down list.
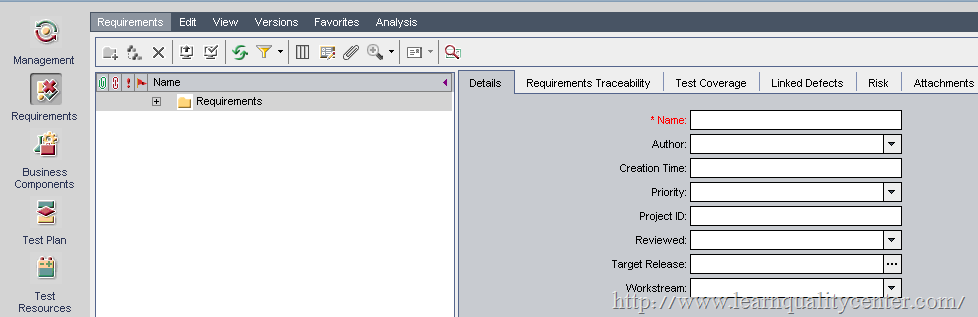
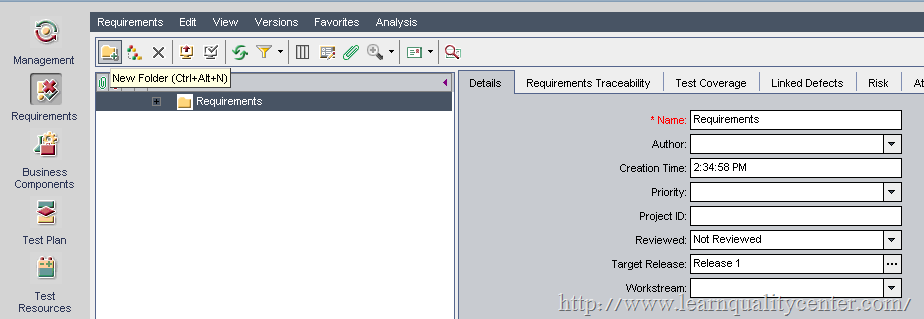
- Navigate to Requirements module present on the left hand side of the application. The snap shot is provided below.
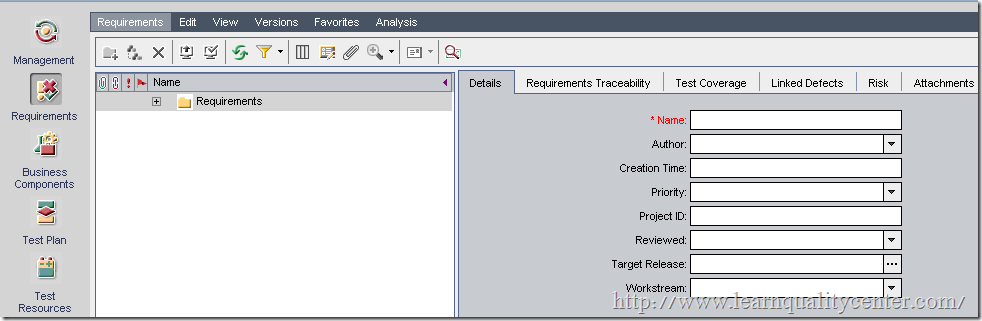
- Requirements are classified as User Requirements, Business Requirements and System Requirements.
- Create a new folder by clicking on the “New Folder†option present below the Requirements menu bar.
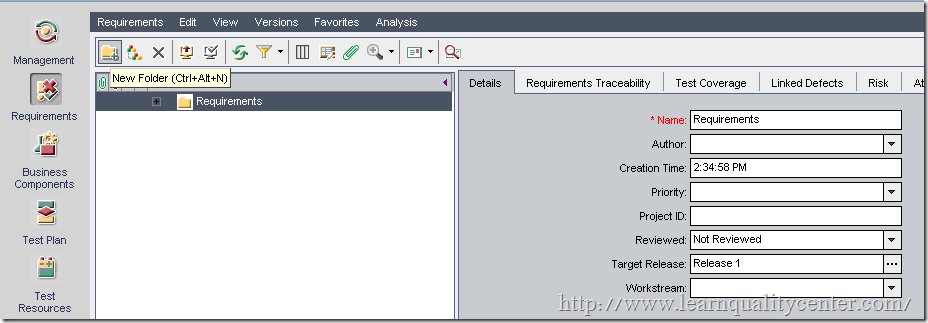
- Provide a name to the requirement folder and click on OK.
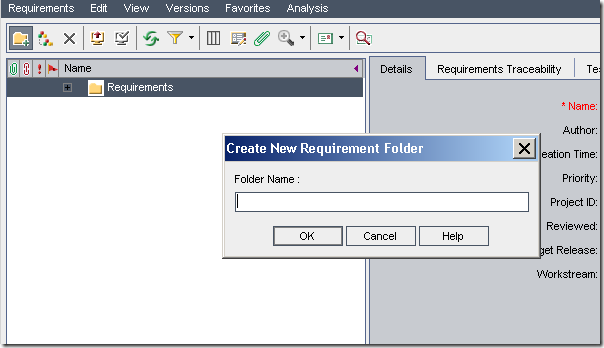
- A new requirement folder is created successfully. Click on “New Requirement†button present beside the new folder.
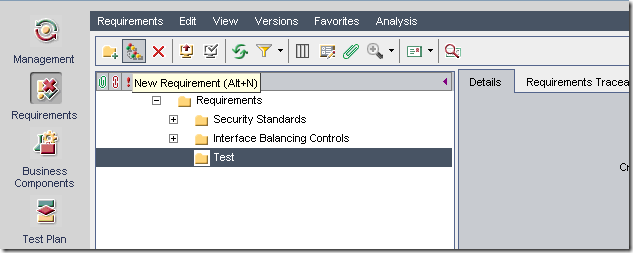
- A pop up appears, Provide the Requirement Type(Business,User,System) and Requirement Name in the edit box and click on OK.
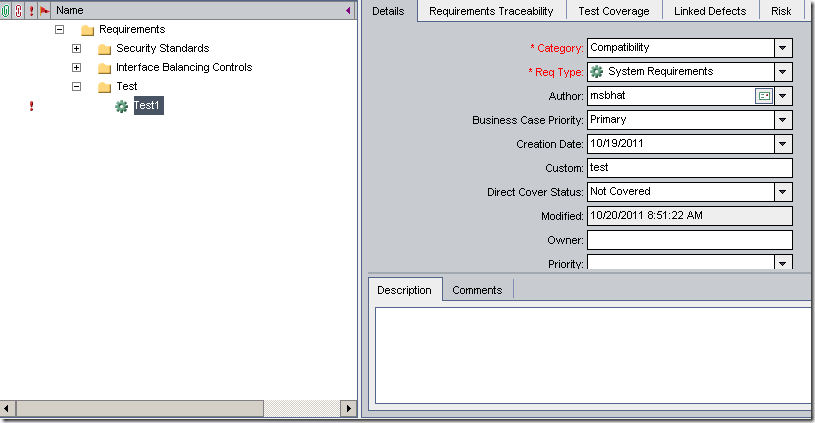
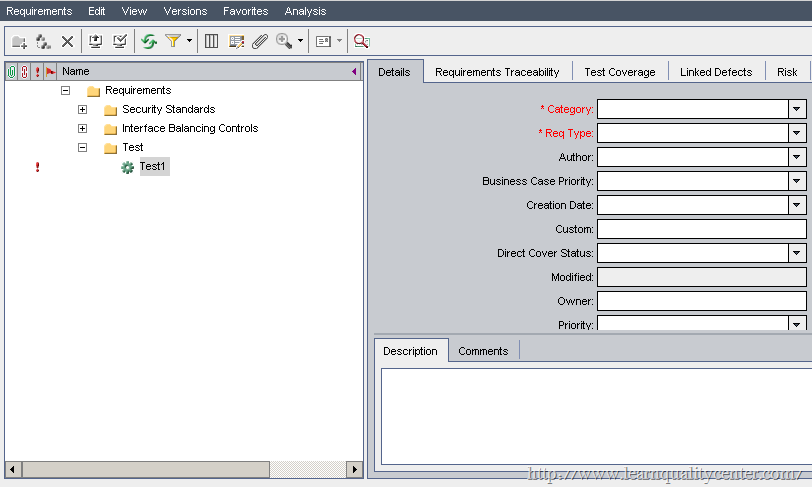
- Once the user clicks on OK a new window opens.Provide all the details in the fields specified.
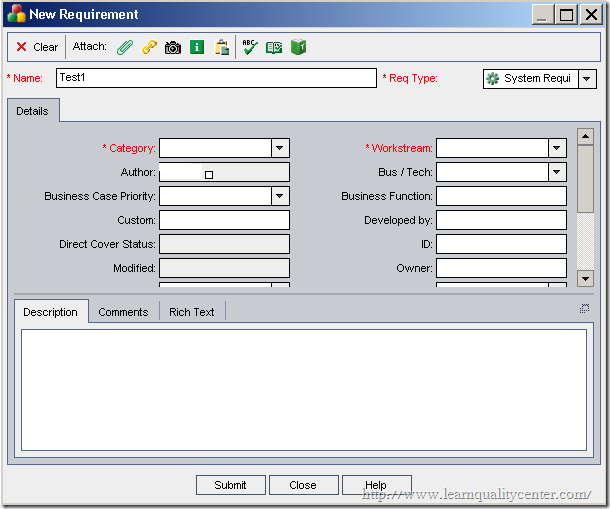
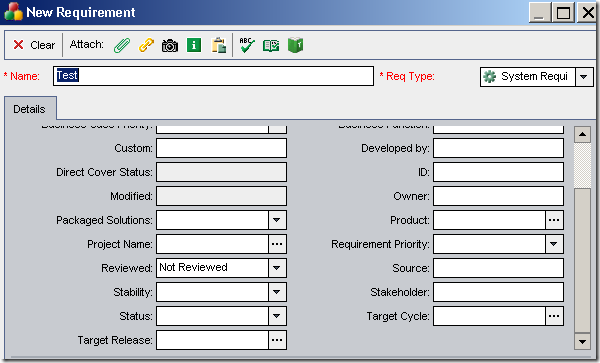
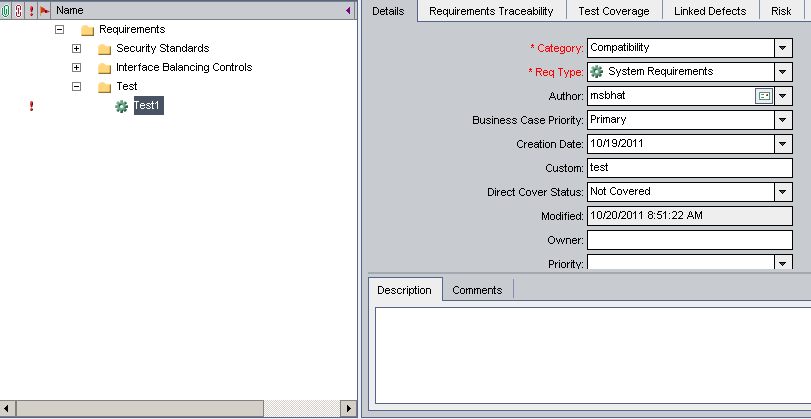
- The fields marked in red such as Category and Workstream are mandatory fields. Without providing values for these fields, a requirement cannot be submitted. Input all the other details such as Custom, Business Function, Bus/Tech etc and submit the requirement.
- Once the user submits the requirement, all details inputted by the user will be displayed as shown below.
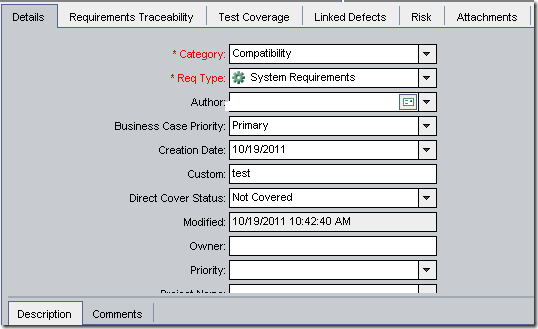
- A user can create multiple child requirements by following the steps as mentioned above.
- Requirements Traceability – Requirements can be traced in every project through the functions Trace From and Trace To.
Trace From – Requirements that affect <Test1>
Trace To – Requirements affected by <Test1>
Find the snap shot below for more info.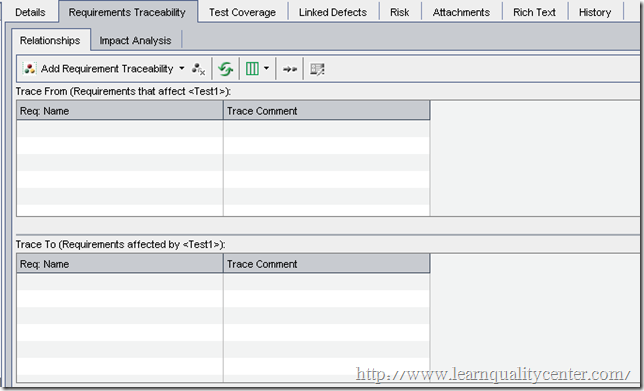
- A requirement can be converted to a Test. Right Click on the Requirement and select “Convert to Testsâ€.Find the snap shot below.
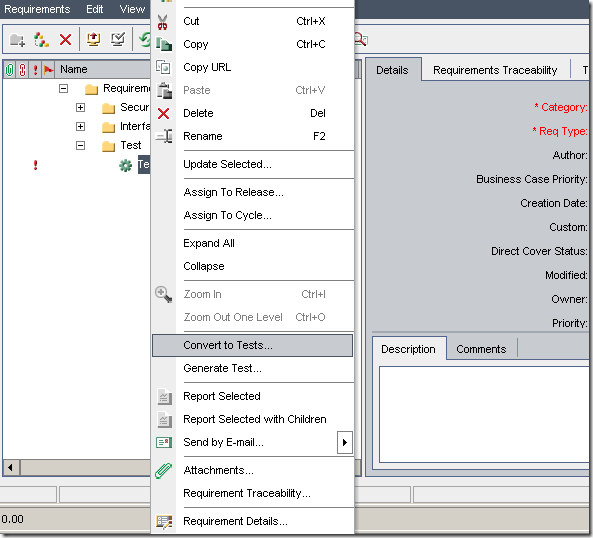
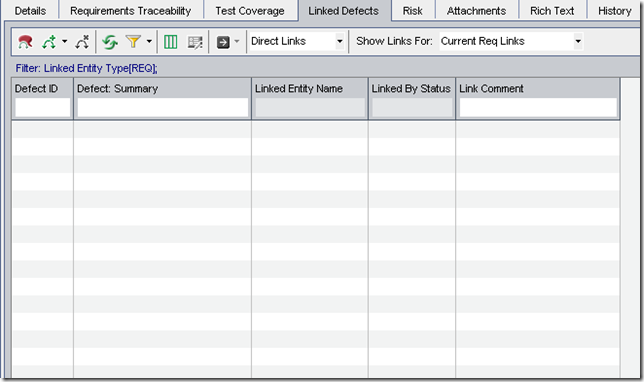
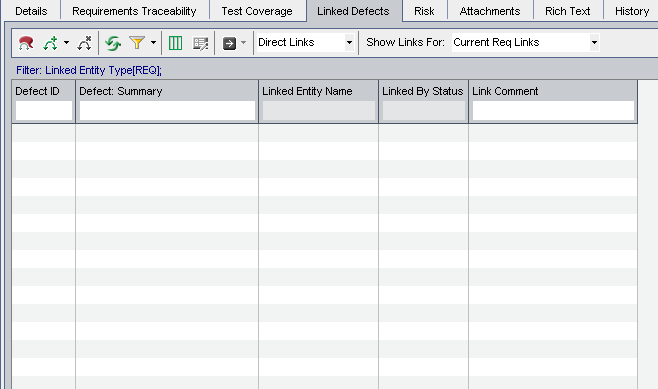
- Defects can be added and linked to the requirements as per the snap shot shown below.
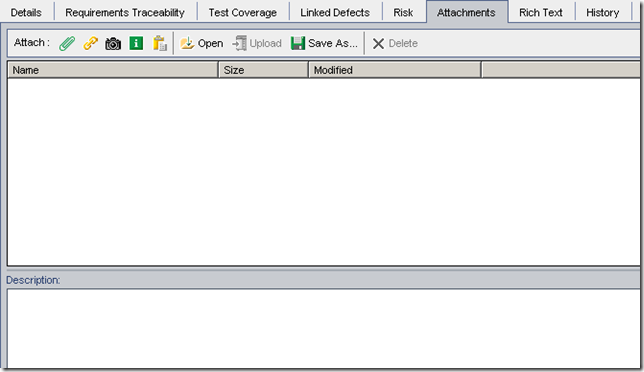
- Attachments can be attached to a particular requirement.
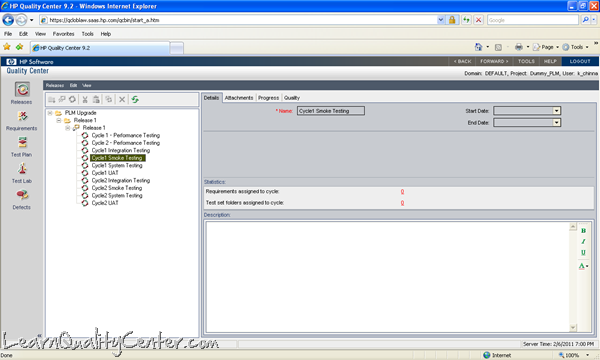
- Every requirement should be tagged to a release and a cycle. Consider an example given below for a release and a Cycle.
- Consider a new project is started and it spans over a period of three months. This three month period can be tagged as a release and there may be many phases such as Analysis, Development, Deployment etc.All these activities can be tagged as cycles and requirements can be tagged to the cycles as a part of execution.
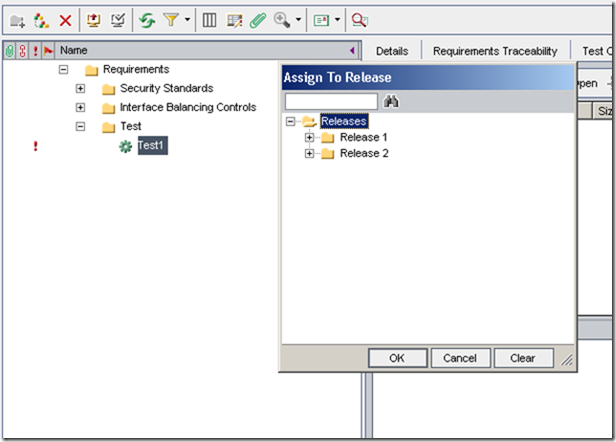
- Navigate to Requirements present on the menu bar and click on “Assign to Release†and tag the particular requirement.
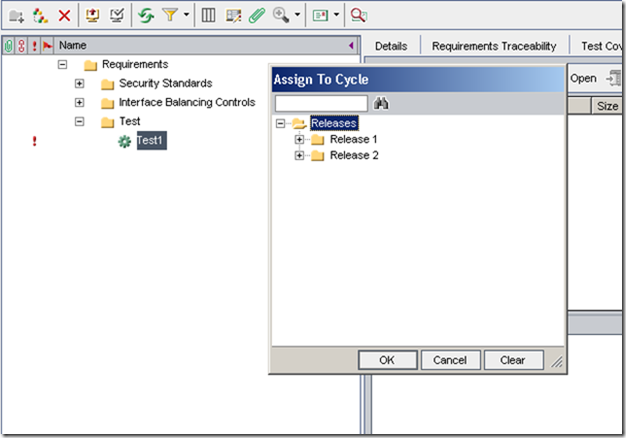
- Navigate to Requirements present on the menu bar and click on “Assign to Cycle†and tag the particular requirement
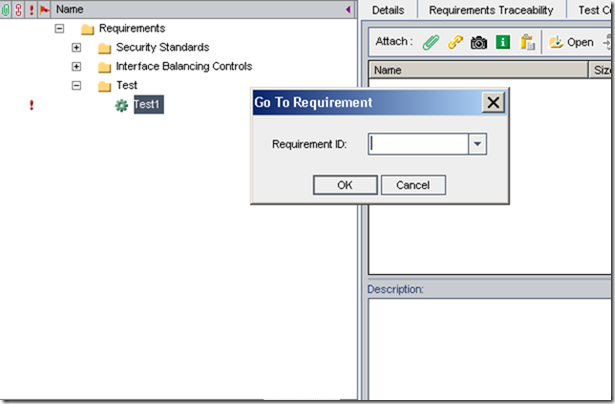
- If the requirement tree is very huge and user needs to find the requirement, a user can provide the requirement ID and click on “Go To Requirement”
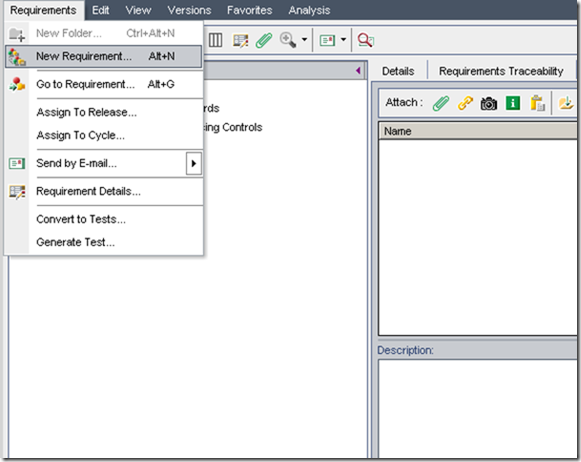
- A Requirement and its details can be sent via an email to the specified user. Navigate to Requirements present on the menu bar and click on the option “Send by Emailâ€.
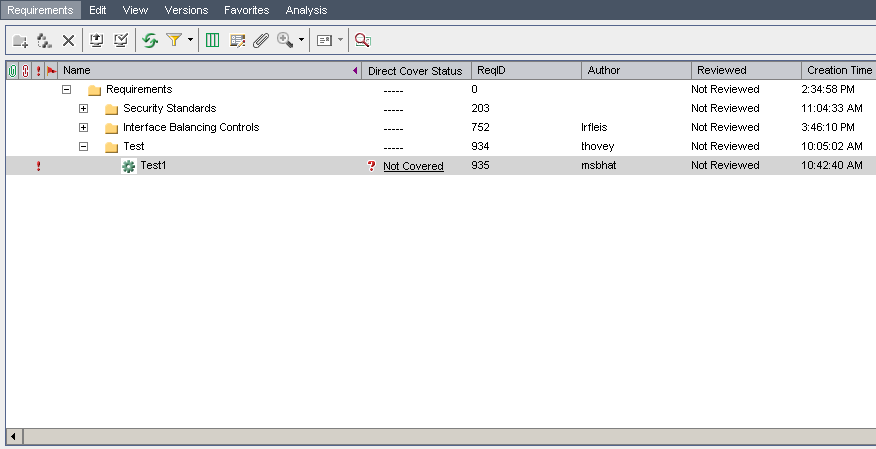
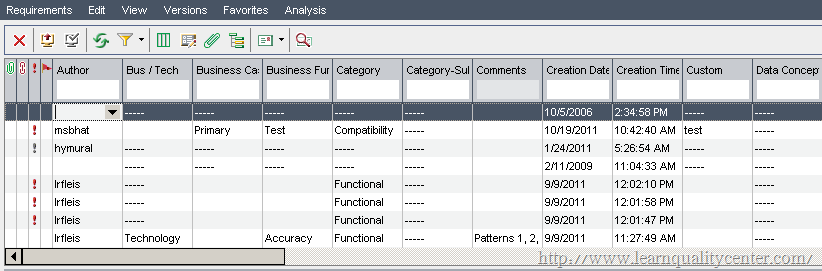
- The Requirement view can be changed to three different views as mentioned below “Requirements Treeâ€, †Requirement Details†and “Requirements Gridâ€. Requirement Details:
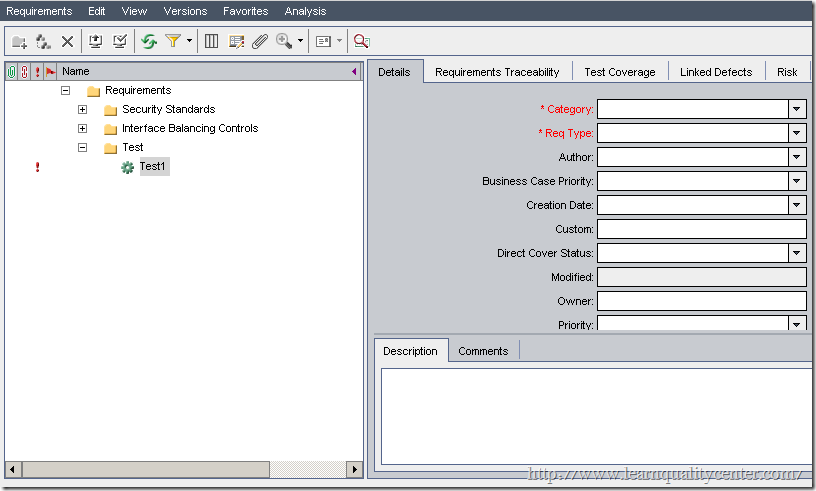 Requirements Tree:
 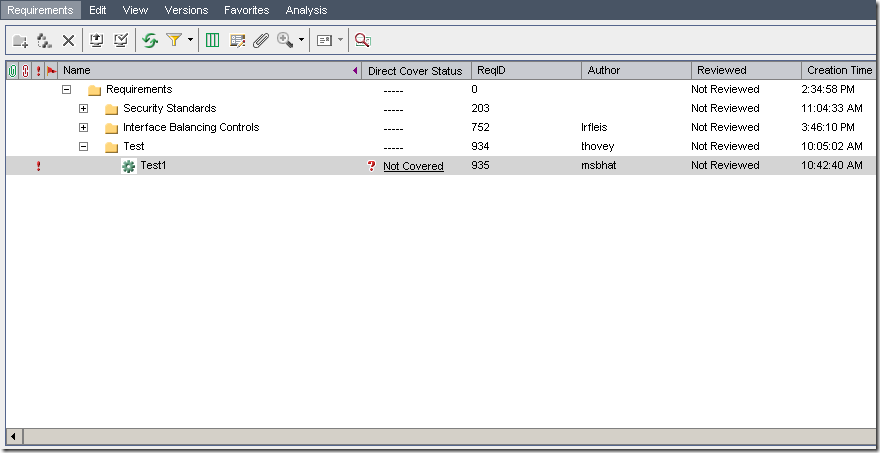 Requirements Grid: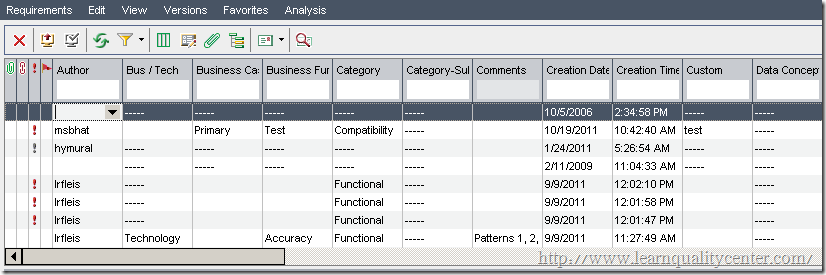



 initiative