

Test Lab module helps user in pulling the test cases from the test plan to test lab. The user can execute the test case on the application designated and the results can be updated in this module.
This is a series of articles on Test Lab module in Quality Center. In this series we’ll see how to create test sets, how to load test scripts from test pan to test lab, how to manually run those scripts and how to run those scripts using automated tools provided by HP. (You can click on the images below to see them in full size)
How to create Test Sets and load test scripts from Test plan module to test lab module?
[Pre-requisites: All the test scripts should already be uploaded to the test plan module]
Creating a new test set
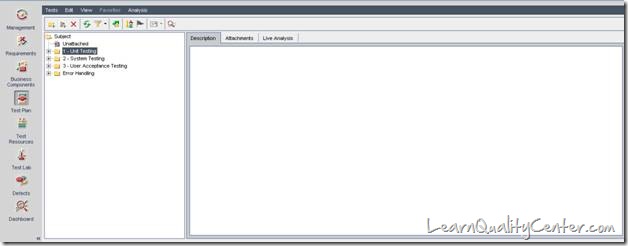
Click on the Test lab icon on the main menu bar. It will open the Test lab module as shown below. Right click on the concerned folder in the Test lab tree and click on New Test Set as shown below.
[wp_lightbox_prettyPhoto_image link=”https://www.learnqualitycenter.com/wp-content/uploads/2011/10/1.jpg” description=”QC Test Lab” source=”https://www.learnqualitycenter.com/wp-content/uploads/2011/10/clip_image002.jpg” title=”QC Test Lab”]A pop up window appears as shown. Fill in the “Test Set Name†and click on Ok button.
[wp_lightbox_prettyPhoto_image link=”https://www.learnqualitycenter.com/wp-content/uploads/2011/10/2.jpg” description=”QC Test Lab” source=”https://www.learnqualitycenter.com/wp-content/uploads/2011/10/qc-testlab-testset.jpg” title=”QC Test Lab”]Another pop up window appears. Provide the description.
[wp_lightbox_prettyPhoto_image link=”https://www.learnqualitycenter.com/wp-content/uploads/2011/10/3.jpg” description=”QC Test Lab” source=”https://www.learnqualitycenter.com/wp-content/uploads/2011/10/qctestlabtestsetdescription.jpg” title=”QC Test Lab”]A new Test set will be created under the selected folder as shown below
[wp_lightbox_prettyPhoto_image link=”https://www.learnqualitycenter.com/wp-content/uploads/2011/10/4.jpg” description=”QC Test Lab” source=”https://www.learnqualitycenter.com/wp-content/uploads/2011/10/qctestlabtestsetcreation.jpg” title=”QC Test Lab”]Moving Test scripts to Test lab from Test plan
Select the test set created and right click.We can look into an option “Select Testsâ€. Click on the option.
[wp_lightbox_prettyPhoto_image link=”https://www.learnqualitycenter.com/wp-content/uploads/2011/10/5.jpg” description=”QC Test Lab” source=”https://www.learnqualitycenter.com/wp-content/uploads/2011/10/clip_image014.jpg” title=”QC Test Lab”]This opens up a Test Plan tree as shown below.
[wp_lightbox_prettyPhoto_image link=”https://www.learnqualitycenter.com/wp-content/uploads/2011/10/6.jpg” description=”QC Test Lab” source=”https://www.learnqualitycenter.com/wp-content/uploads/2011/10/qctestlabexecutiongrid.jpg” title=”QC Test Lab”]
Select the test set and the test cases which needs to be moved to the test lab
[wp_lightbox_prettyPhoto_image link=”https://www.learnqualitycenter.com/wp-content/uploads/2011/10/7.jpg” description=”QC Test Lab” source=”https://www.learnqualitycenter.com/wp-content/uploads/2011/10/qctestlabexecutiongriddetails.jpg” title=”QC Test Lab”]
All the Test scripts present in the selected Test Set of the Test Plan tree will be moved to the selected Test set in the Test Lab as shown below.
[wp_lightbox_prettyPhoto_image link=”https://www.learnqualitycenter.com/wp-content/uploads/2011/10/8.jpg” description=”QC Test Lab” source=”https://www.learnqualitycenter.com/wp-content/uploads/2011/10/qctestlabtestsetmovingscripts.jpg” title=”QC Test Lab”]
Multiple test cases can be pulled from the test plan tree to the test set as shown below. Select the folder which needs to be pulled. A pop up appears to confirm the test case pulling from Test plan tree. Click on Yes and all the test cases will be moved to the test set.
[wp_lightbox_prettyPhoto_image link=”https://www.learnqualitycenter.com/wp-content/uploads/2011/10/9.jpg” description=”QC Test Lab” source=”https://www.learnqualitycenter.com/wp-content/uploads/2011/10/qctestlabtestsetmovingmultiplescripts.jpg” title=”QC Test Lab”]
Running Test Scripts manually
We will now see how to execute test scripts from the test lab.
Select the Run button as shown in the screenshot below.
[wp_lightbox_prettyPhoto_image link=”https://www.learnqualitycenter.com/wp-content/uploads/2011/10/10.jpg” description=”QC Test Lab” source=”https://www.learnqualitycenter.com/wp-content/uploads/2011/10/qctestlabtestexecution.jpg” title=”QC Test Lab”]
When Run Manually is selected, the manual runner Pop up window will be displayed
[wp_lightbox_prettyPhoto_image link=”https://www.learnqualitycenter.com/wp-content/uploads/2011/10/11.jpg” description=”QC Test Lab” source=”https://www.learnqualitycenter.com/wp-content/uploads/2011/10/qctestlabmanualrunner.jpg” title=”QC Test Lab”]
The Manual Runner screen will display all the steps in the script.
[wp_lightbox_prettyPhoto_image link=”https://www.learnqualitycenter.com/wp-content/uploads/2011/10/12.jpg” description=”QC Test Lab” source=”https://www.learnqualitycenter.com/wp-content/uploads/2011/10/clip_image041.jpg” title=”QC Test Lab”]
[wp_lightbox_prettyPhoto_image link=”https://www.learnqualitycenter.com/wp-content/uploads/2011/10/13.jpg” description=”QC Test Lab” source=”https://www.learnqualitycenter.com/wp-content/uploads/2011/10/clip_image043.jpg” title=”QC Test Lab”]
Select ‘Attach To Step’ from the Attachment dropdown if any attachment is to be uploaded.
[wp_lightbox_prettyPhoto_image link=”https://www.learnqualitycenter.com/wp-content/uploads/2011/10/14.jpg” description=”QC Test Lab” source=”https://www.learnqualitycenter.com/wp-content/uploads/2011/10/clip_image045.jpg” title=”QC Test Lab”]Any number of attachments can be uploaded (might be snap shot, doc, code snippet, errors etc) to the step for a particular test case. The maximum size of an attachment would be 5 MB. Once the attachments have been attached, you can close the attachments section.
[wp_lightbox_prettyPhoto_image link=”https://www.learnqualitycenter.com/wp-content/uploads/2011/10/15.jpg” description=”QC Test Lab” source=”https://www.learnqualitycenter.com/wp-content/uploads/2011/10/clip_image047.jpg” title=”QC Test Lab”]Click on ‘End Run’ once the status is updated and attachments have been uploaded.
[wp_lightbox_prettyPhoto_image link=”https://www.learnqualitycenter.com/wp-content/uploads/2011/10/16.jpg” description=”QC Test Lab” source=”https://www.learnqualitycenter.com/wp-content/uploads/2011/10/clip_image049.jpg” title=”QC Test Lab”]The main QC page opens with the status of the test case changed to Passed.
[wp_lightbox_prettyPhoto_image link=”https://www.learnqualitycenter.com/wp-content/uploads/2011/10/17.jpg” description=”QC Test Lab” source=”https://www.learnqualitycenter.com/wp-content/uploads/2011/10/qctestlabtestcasepassed.jpg” title=”QC Test Lab”]There are a few criteria’s defined below for the status field of a particular test case.
- If all the steps in the test case pass then we can readily select ‘Pass All’. This updates all the steps of a test case to Pass. [wp_lightbox_prettyPhoto_image link=”https://www.learnqualitycenter.com/wp-content/uploads/2011/10/18.jpg” description=”QC Test Lab” source=”https://www.learnqualitycenter.com/wp-content/uploads/2011/10/clip_image053.jpg” title=”QC Test Lab”]
- If any step in a test case fails because of an issue then we can go into the step and update the status of the step to be ‘Failed’. [wp_lightbox_prettyPhoto_image link=”https://www.learnqualitycenter.com/wp-content/uploads/2011/10/19.jpg” description=”QC Test Lab” source=”https://www.learnqualitycenter.com/wp-content/uploads/2011/10/clip_image055.jpg” title=”QC Test Lab”]
- If any step is left as ‘No Run’ in a test case, the test case status will get changed to “Not Completedâ€. [wp_lightbox_prettyPhoto_image link=”https://www.learnqualitycenter.com/wp-content/uploads/2011/10/20.jpg” description=”QC Test Lab” source=”https://www.learnqualitycenter.com/wp-content/uploads/2011/10/clip_image057.jpg” title=”QC Test Lab”]
When end run is clicked the status of the test case will be changed as shown below.
[wp_lightbox_prettyPhoto_image link=”https://www.learnqualitycenter.com/wp-content/uploads/2011/10/21.jpg” description=”QC Test Lab” source=”https://www.learnqualitycenter.com/wp-content/uploads/2011/10/qctestlabtestcasenotcompleted.jpg” title=”QC Test Lab”]
In the next article we’ll see “How to raise a new defect from inside test lab.â€





 initiative